Migrating to Thesaurus Payroll Manager - mid year
This guidance is specifically designed to help users migrating to Thesaurus Payroll Manager mid tax-year get started.
Additional detailed explanations and guidance can be found through the extensive built-in help file which is broken down by each software feature and most common user queries. If you require help with any section as you progress through the program, please refer to the ‘Help’ menu and ‘Search for help on’ to view or print our comprehensive help file.
Step 1 - Add your Company
To access this utility, go to File > Add New Company >
- Enter your Company Name and Company address. Click Next.
- Enter your Employer Registered Number - This is your PAYE registered number and is normally 7 digits and 1 or 2 letters. The employer registered number is often the same as your VAT number. Click Next.
- If you wish to run fortnightly payroll instead of weekly payroll, tick the box provided to indicate this. Click Next.
You will be able to run a combination of either Fortnightly & Monthly payroll OR Weekly & Monthly payroll but NOT Weekly & Fortnightly. - Enter a password of your own choosing in both boxes - your password must be 4 alpha/numeric characters e.g. Pass, 1234, AB12.
- Click Finish once a password has been entered
- Select Weekly or Monthly OR Select Fortnightly or Monthly. In the Windows menu, you can subsequently switch between payroll types.
Step 2 - Add your Digital Certificate
Once your company is set up, the next step is to add your digital certificate into the software in order to be able to retrieve Revenue Payroll Notifications (RPNs) and submit payroll submissions (PSRs) to Revenue.
This is a once-off exercise and your digital certificate must already be on the same machine as the software itself.
- If you are an employer using the Standard version of Thesaurus Payroll Manager, simply click here for step-by-step guidance on how to add your digital certificate into the software
- If you are using the Bureau version of Thesaurus Payroll Manager and hold an agent digital certificate, simply click here for step-by-step guidance on how to add your agent digital certificate into Thesaurus Payroll Manager
In the event that your digital certificate is not on the same machine as your payroll software, guidance is provided here on how you can move your certificate from one machine to another.
Step 3 - Set up your employee records using the RPN
After adding your digital certificate, you are now ready to set up your employee records. The quickest way to do this is by using the Revenue Payroll Notification (RPN).
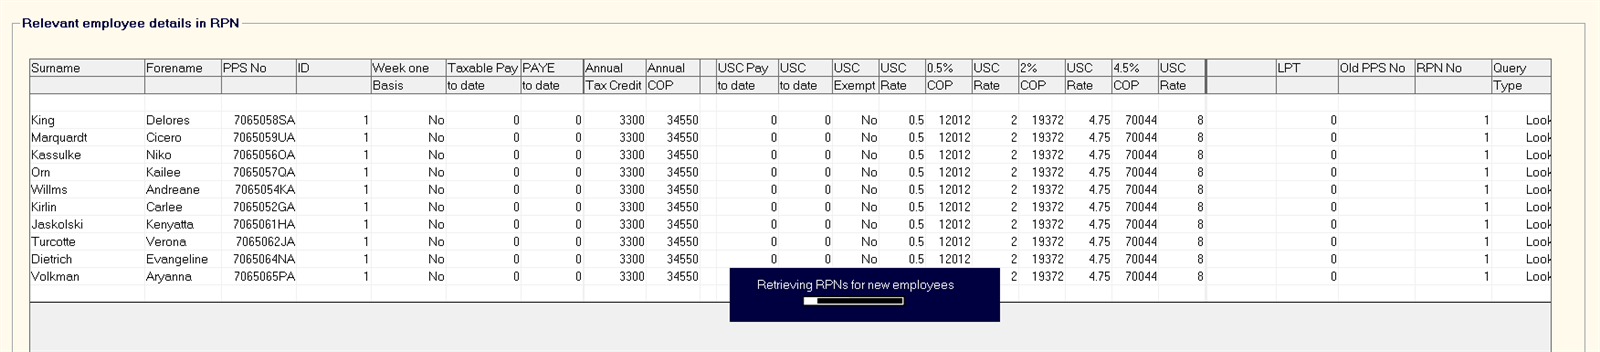
- Go to Process icon No. 2 – the RPN import utility.

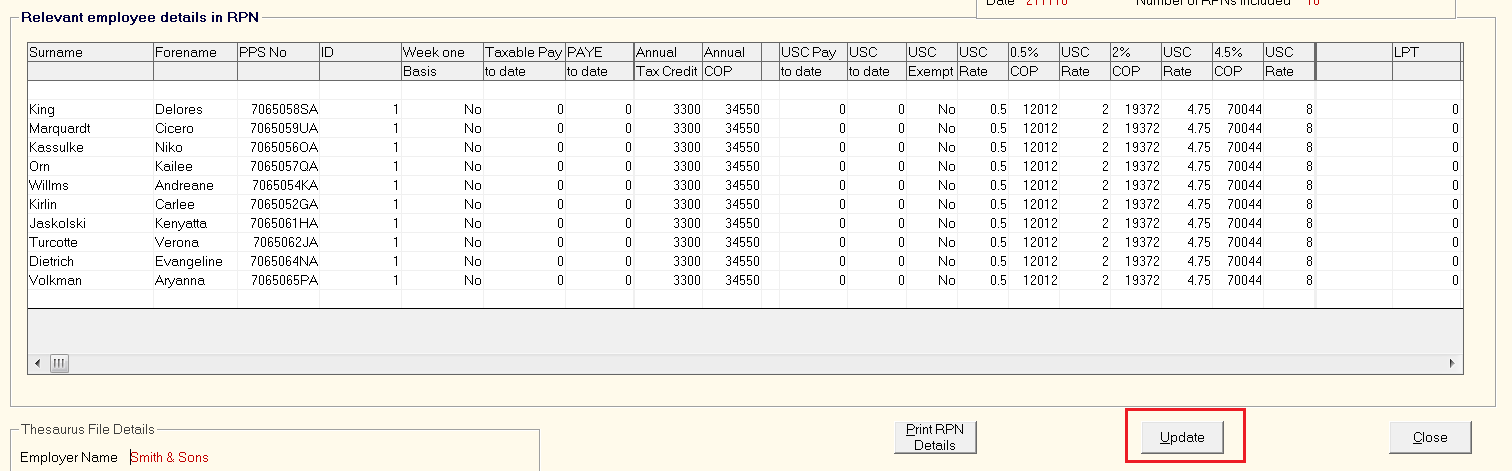
- The software will automatically connect to Revenue’s systems and retrieve all available RPNs, which will then be displayed on screen:
- When ready, click ‘Update’:
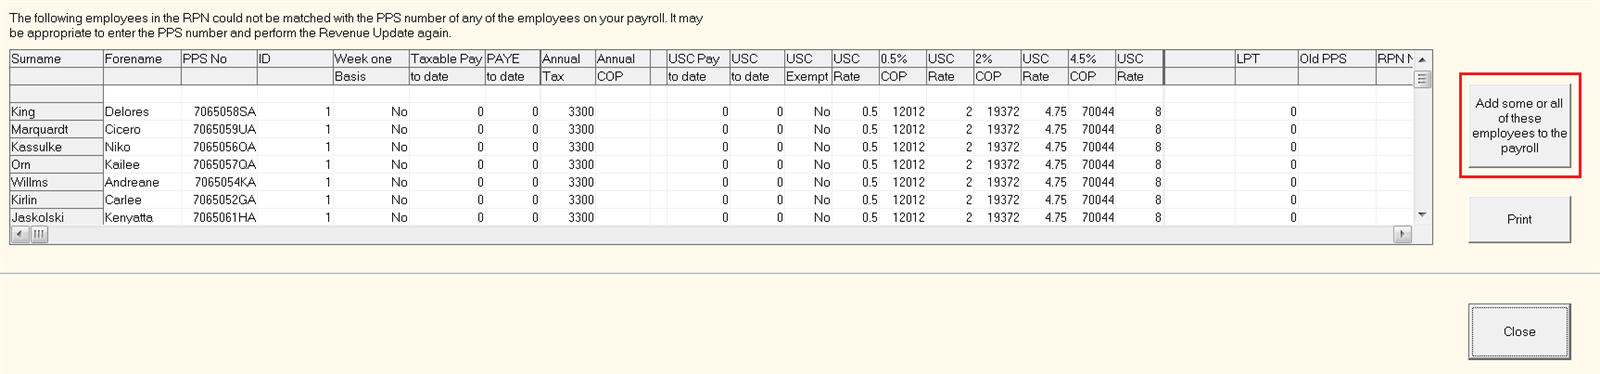
The screen that now appears for you will indicate that you have employees in the RPN which cannot be matched to any employee record in the software.
- To create employee records for these employees, click ‘Add some or all of these employees to the payroll’:
- On the next screen, indicate which pay frequency type you wish to add your employees to and move the employees across, as required.
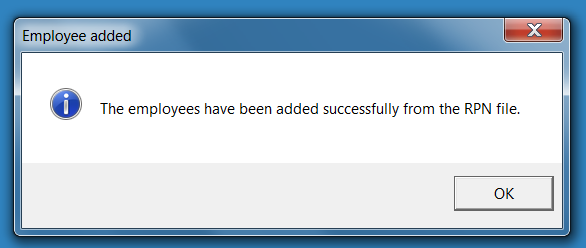
Click ‘Finish’ when complete: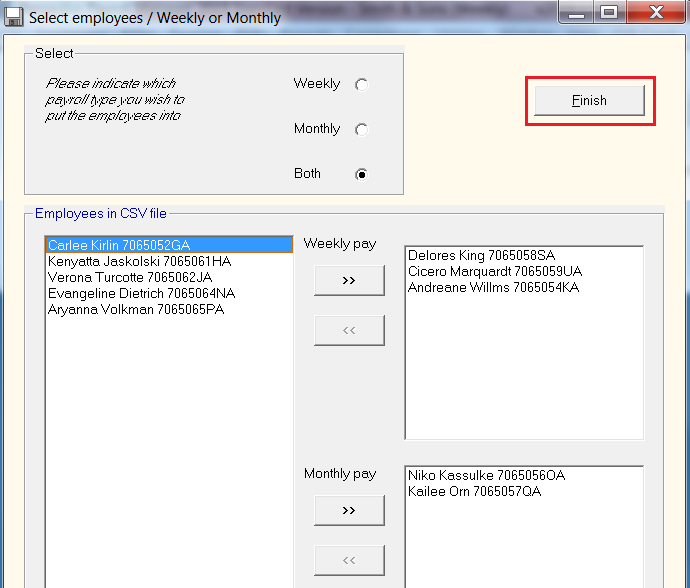
- Employee records will now be created for the selected employees.
Step 4 - Set your Start Period
You will now be prompted to indicate the first period that you wish the payroll to start from e.g. if you have previous cumulative pay amounts up to and including week 10, then enter week 11 as the first period you wish to process in Thesaurus Payroll Manager.

In the event the wrong start period is entered, this can subsequently be amended by going to Utilities > Set start period for mid year setup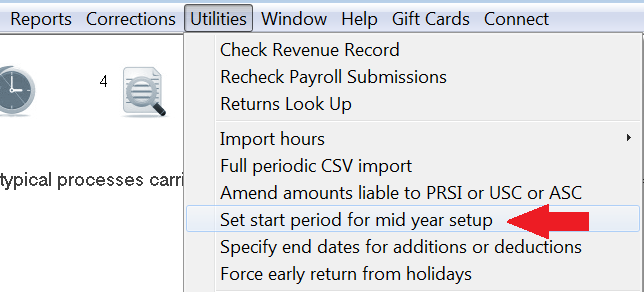
Step 5 - Enter your Employees' Mid-year Cumulatives
Your newly created employee records can now be accessed through Process icon No.1:

Please note: when setting up employees using an RPN, it is important to note that this will only bring in the information that is included in the RPN, e.g. the employee’s name, PPS number and revenue details.
As a default, imported employees will also have their payment type set to ‘Cash’ and their PRSI class to A1 which can subsequently be changed for each employee as required.
- select an employee using the Surname drop down menu to complete their employee details:

a) Within Personal Details, enter any missing information you require e.g. the employee's rate of pay, email address and bank details.
b) Within Revenue Details, select the correct PRSI class for the employee. If the employee has commenced employment with you in the current tax year, enter their start date accordingly.
c) Within Additions, enter any taxable or non-taxable additions applicable to the employee.
d) Within Deductions, enter any pension deductions, and any allowable or non-allowable deductions applicable to the employee.
e) Within HR Details, enter any HR related details accordingly
f) Within CSO, complete this screen in order to be able to compile CSO statistics in the future.
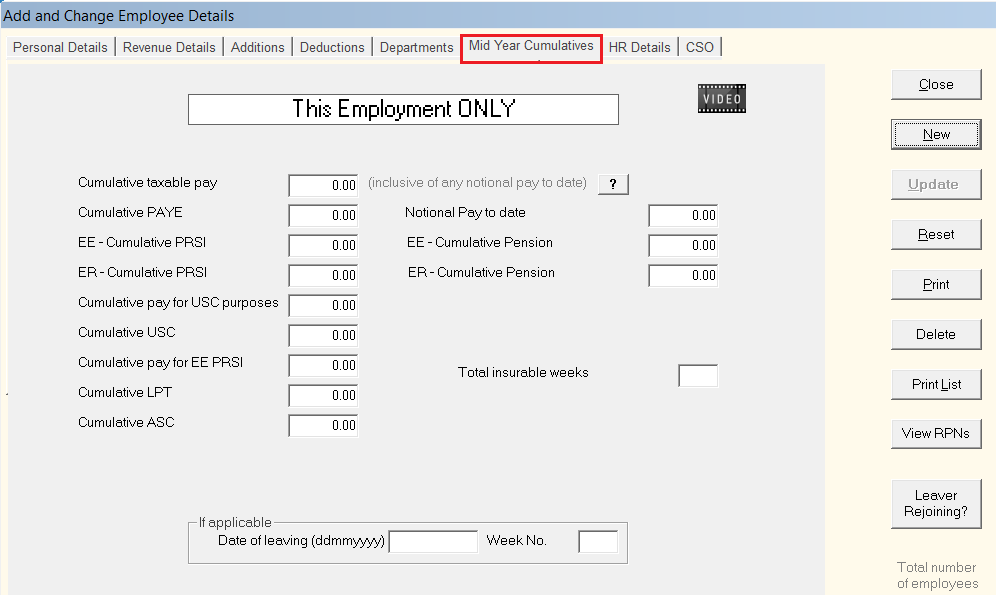
You are now ready to enter your employee's mid-year cumulative pay information:
This is one of the most important sections within the payroll software. Cumulative pay information entered here will then determine the amount of PAYE, USC etc. that the employee will pay going forward. With this in mind, users should ensure that the cumulative details for each employee are correct before proceeding to process any payroll.
- Within the employee's record, select the 'Mid Year Cumulatives' tab:
-
Enter the Cumulative Taxable Pay (This employment only)
-
Enter the Cumulative PAYE (This employment only)
-
Enter the Employee Cumulative PRSI (This employment only)
-
Enter the Employer Cumulative PRSI (This employment only)
-
Enter the Cumulative Pay for USC (This employment only)
-
Enter the Cumulative USC (This employment only)
-
Enter the Cumulative Pay for EE PRSI (This employment only)
-
Enter the Cumulative Local Property Tax (LPT ) (This employment only) if applicable
-
Enter the Cumulative ASC (Additional Superannuation Contribution) (This employment only) if applicable
-
Enter the Notional Pay to date (This employment only) if applicable
-
Enter the Cumulative Pension EE (This employment only) if applicable
-
Enter the Cumulative Pension ER (This employment only) if applicable
-
Enter the Total insurable weeks of employment - this refers to the number of weeks the employee has been paid so far in this tax year in this employment
Please Note: If the employee has income and deductions from a previous employment that has taken place in the same tax year, then the employee's Revenue Details section will be automatically updated with their previous employment amounts when the first RPN is retrieved for them in the software (unless employee is on a week 1/ month 1 basis in the RPN).
It is only the income and deductions from THIS employment which should be entered to the Mid Year Cumulatives screen.
- Once all sections of the employee's record have been completed, click Update to save the record
- Repeat Step 5 for all subsequent employees.
Need help? Support is available at 01 8352074 or thesauruspayrollsupport@brightsg.com.