Submitting your periodic pay data to Revenue
Since the 1st January 2019, employers are required to submit their payroll data to Revenue every time they perform a pay run – most importantly, this periodic submission needs to be received by Revenue ‘on or before’ payment is made to the employees.
This periodic submission of your payroll data to Revenue is known as the Payroll Submission Request (PSR).
After updating a pay period, Thesaurus Payroll Manager will automatically create the Payroll Submission Request required by Revenue and you will see that process icon 6 will immediately prompt you that the submission is outstanding: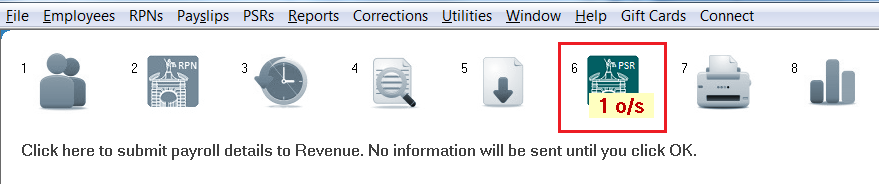
- To therefore submit your PSR to Revenue after you complete each pay run, click Process Icon No. 6, followed by ‘Prepare PSR’:
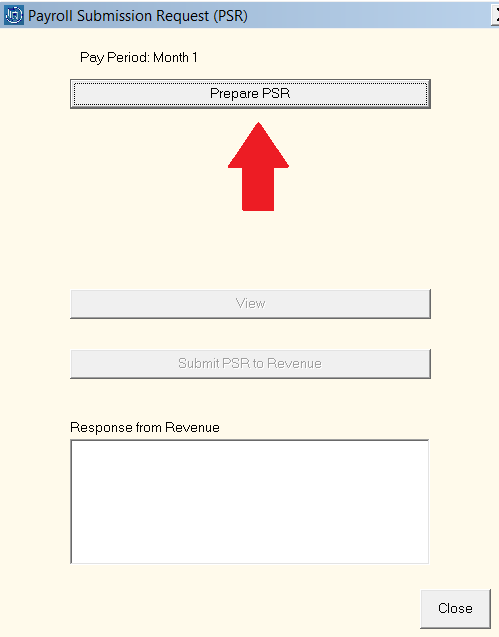
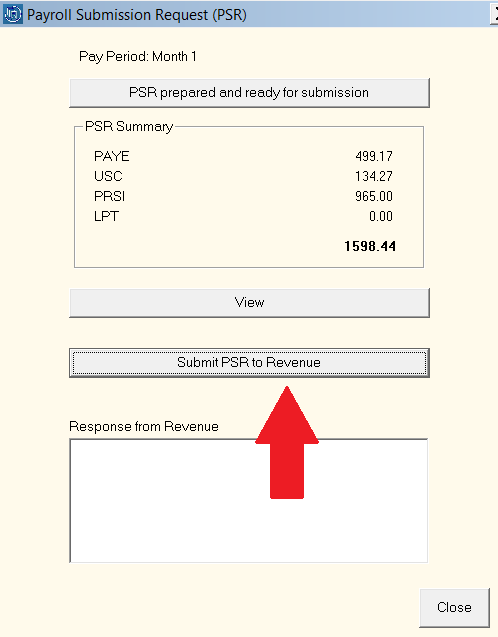
A summary of the PAYE, USC, PRSI & LPT totals included in the submission will be displayed on screen for you to view.
- Should you wish to view the detailed contents of the PSR before submission, click 'View'.
- When ready to do so, click ‘Submit PSR to Revenue’:
As soon as the submission is successfully received by Revenue, a confirmation response will be received back into the software confirming successful receipt, as well as the total amount of taxes that were included in the submission.
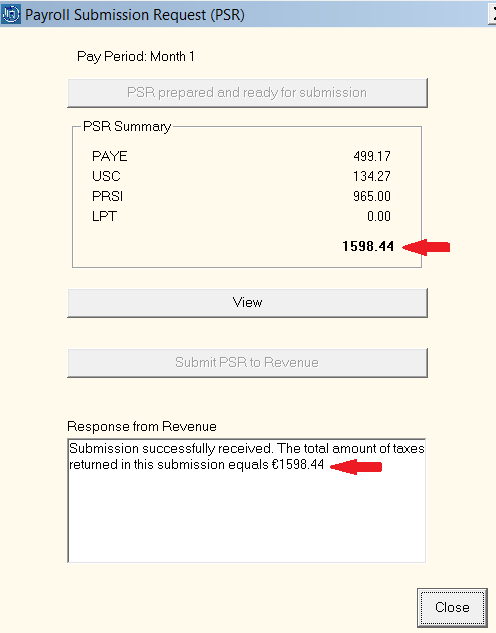
- Press 'Close' to exit the PSR utility.
You are now ready to distribute your employee payslips and pay your employees.
Backing up your Payroll Data
On closing out of the PSR utility, you will be prompted to take a backup of your payroll data.
If you are not using Thesaurus Connect, it is strongly recommended that you complete the backup process, as a backup of your payroll file will provide a safety measure should you experience any problems with your PC.
Please note: we strongly recommend NOT taking a backup to the C: drive of your PC as this does NOT protect your payroll software. Taking a backup to an external drive, e.g. to a USB key, server or to a cloud environment, ensures that your payroll is saved elsewhere.
To back up your payroll data:
- Your company name will already be highlighted on the left hand side - select the drive you wish to backup to from the drop down menu on the right hand side.
- If you would then like to save your backup to an existing sub folder within the drive you have selected, simply double click on this folder in the top right hand box listing.
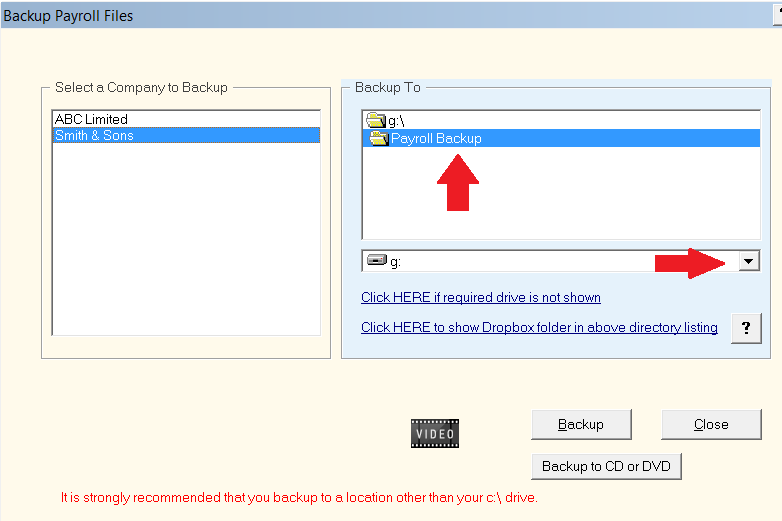
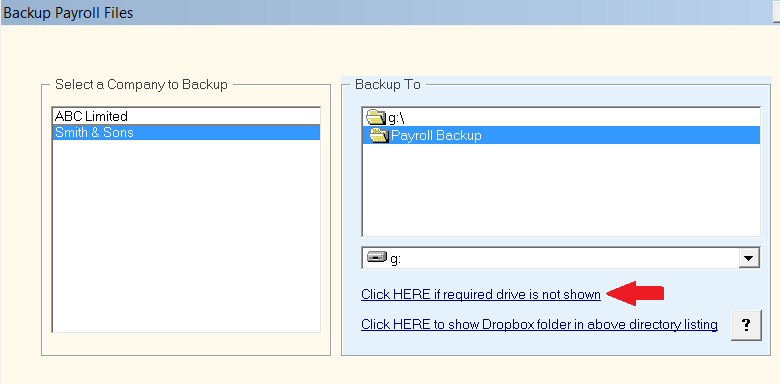
- Alternatively use the option ‘click here if required drive is not shown’ to select your backup location:
- After selecting your backup location, click the ‘Backup’ button.
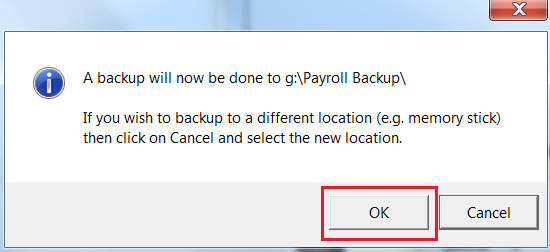
A prompt will appear to confirm your backup location. If you are happy to proceed, click ‘OK’ to continue with the backup.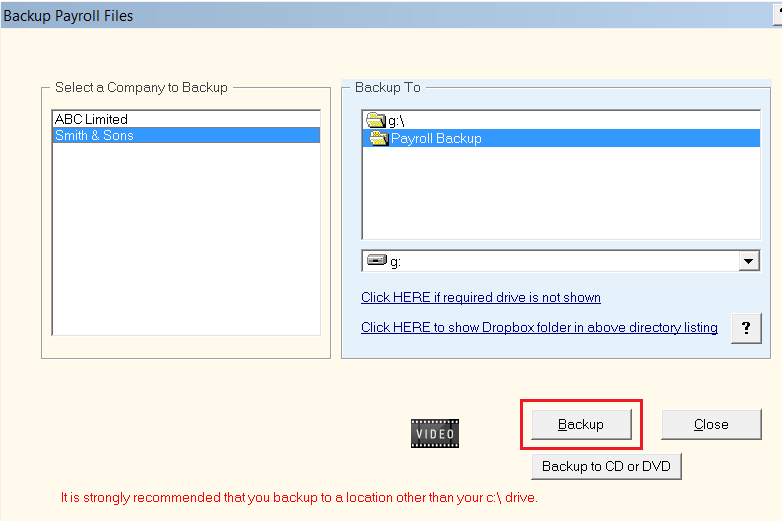
A confirmation message will now appear to confirm that your backup has been successful.
- Click ‘OK’ followed by ‘Close’ to exit.
Need help? Support is available at 01 8352074 or thesauruspayrollsupport@brightsg.com.